Creating Pictures From Screenshots
by Neemers
Introduction
The following tutorial contributed by Neemers will show you how to create your own dragons from screenshots of the episodes. You will need an image editing program such as Microsoft Paint, Gimp, Adobe Photoshop or other such program. This tutorial assumes you will be using Microsoft Paint, but the directions can be adapted for the other tools. You can find numerous screenshots to use as starting points here in Word's Spycam Image Archive.
Let's Get Started!
First open Paint. There's a few tools you'll have to be able to identify and use for this tutorial to work.
Depending upon the settings you use the tool box will either be free-floating on the screen as an extra window or be embedded into the side of the screen. If you see no tool box go to the options bar at the top of the page and hit view, then click on tool box. The tool box should now appear.
The top two buttons in the tool box are selection tools. When this tutorial asks you to select an area you may use either one of these tools for the job.
When you click on one of these two buttons another box will appear right below the tool bar. The top option splices the background color along with everything else while the bottom box does not select the background. For the purposes of this tutorial always have the bottom box selected. When you first see these boxes the top box will be selected as the default.
The yellow rectangle is the eraser. The tool next to it is the paint bucket. Below these on the right is the magnifier tool, and below this to the left is the pencil tool.
The color box should be displayed along the edge of the screen. To the far left of the color bar the current foreground and background colors are displayed. To select a new foreground color, right-click on any box and to select a new background color left-click on any box.
If you don't see all these tools you may have a different version of Paint and may have to modify these instructions to fit the version you have.
Now that you have these instructions down, it's time to get started.
Pop your mouse open and clean it if you don't use an optic mouse. Yes, I know it's a pain but a clean mouse will make this much easier.
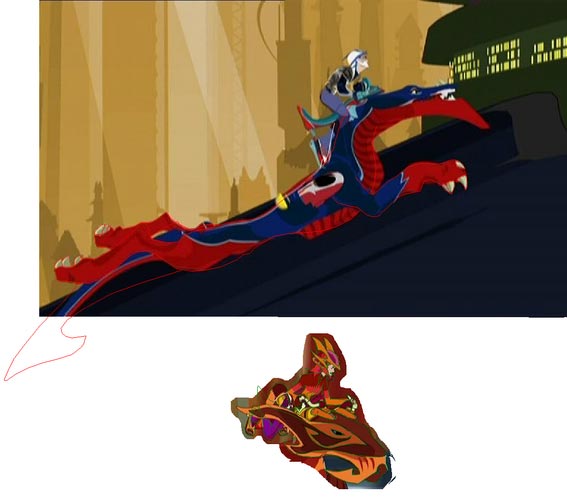
Step 1: Choose Images To Use As Bases
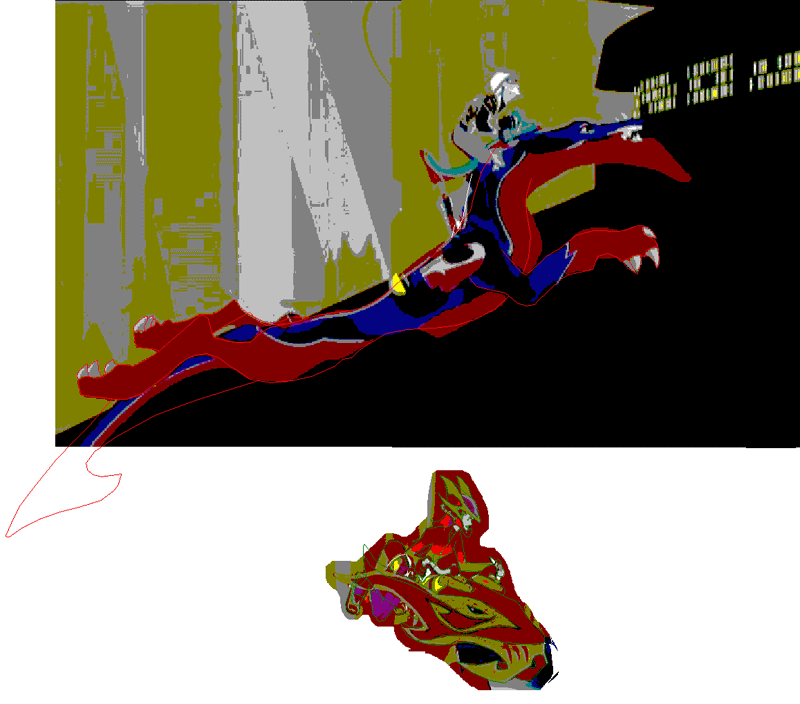
Now choose what bases you want to use for each part and put them all on the same Paint screen, like so:
Resize and crop off edges of the different pieces as necessary to get them to fit together. You can use the eraser tool to get rid of edges of pick up the part you want with the free-form select.
Step 2: Resize and Paste
Select the part you want to resize, then copy and paste it. To resize the image right-click on the selected copied part and pick stretch/skew from the menu that appears. Now enter the same value for both the horizontal and vertical axis. Numbers greater that 100 will make the image bigger while numbers smaller than 100 will make it smaller. Resize all parts that need to be resized and lay them on top of the body. If you resize the body do this first. Do not use the originals since you may make mistakes and need to start over. Feel free to get rid of the originals once you're sure you have the dimensions you want.
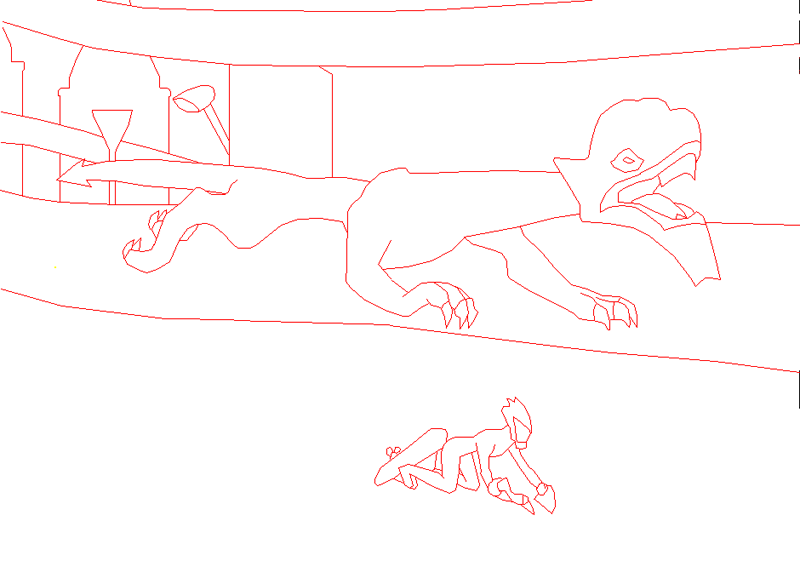
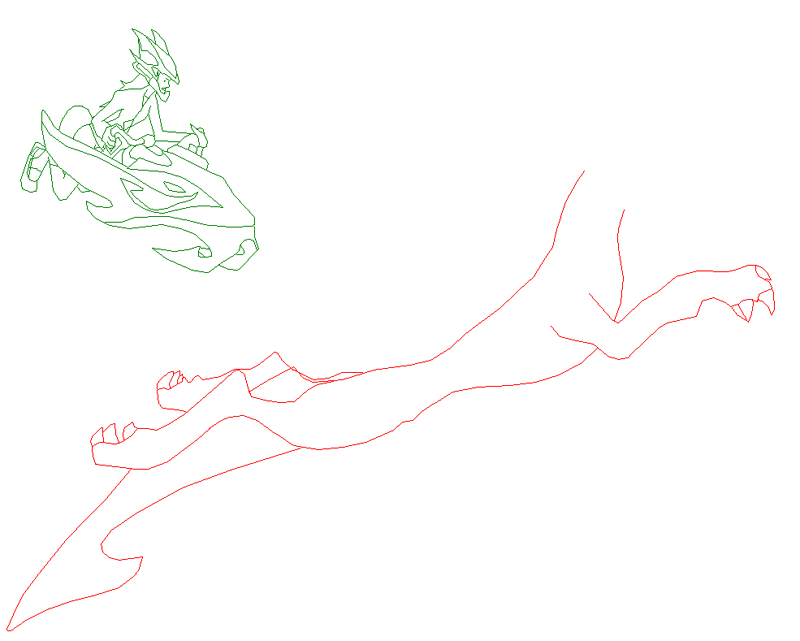
Step 3: Trace Your Dragon
On all parts that were resized use the line tool with a contrasting color for the line color to replace them. Use the magnifier tool to get a better look at the part of the line you are replacing and use very short lines so you can keep the rounded appearance. To do this quickly choose a starting point, click and hold to start the line, drag it for a little way, then release. In the same spot click and hold again to start the new line and repeat this process. You can use this same process to customize areas of the dragon, such as the jowls and tail in the example.
Contrasting colors should be something that should not be see once you switch to the 16-color bitmap format. For example, it probably wouldn't be a good idea to use red on Wyldfyr or black on Beau. Green could be a good choice for Wildfyr, but only if the background she's displayed against isn't green.
Step 4: Isolate the Outline
Save the image as a 16-color bitmap. If you're not sure that the line color you've chosen will work, first save it as a PNG so you can go back to it if you need to and replace the line color.
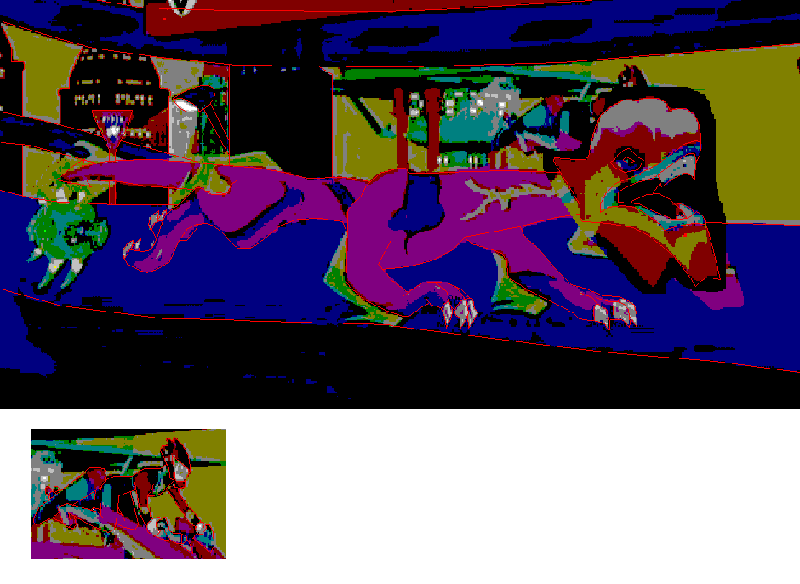
Now get rid of the all colors but that you've chosen for your line. To do this select white as the background color, cut the entire picture and paste it back again. While the picture is still selected switch the background color to one of the colors you selected. Repeat this step with all unwanted colors.
Replace the line color of your choice with black.
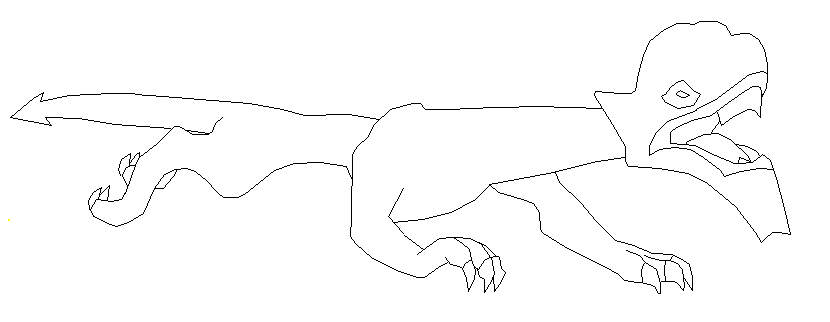
Color your picture.
Example 2
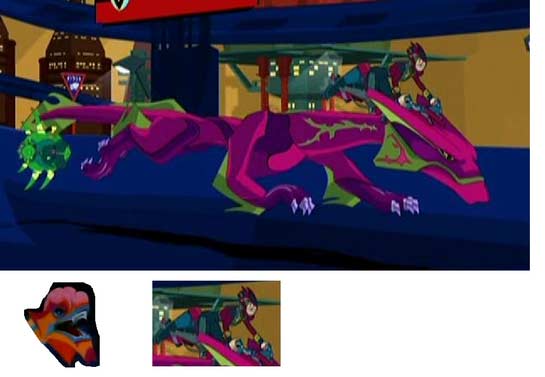
This example shows the same steps, this time creating a new dragon by combining Beau's body with Phorrj's head.
Step 1: Choose Images To Use As Bases

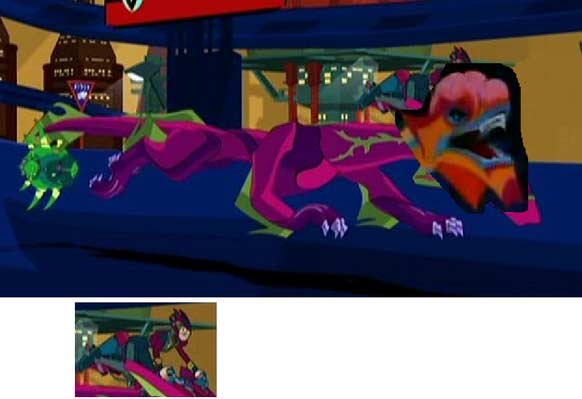
Step 2: Resize and Paste
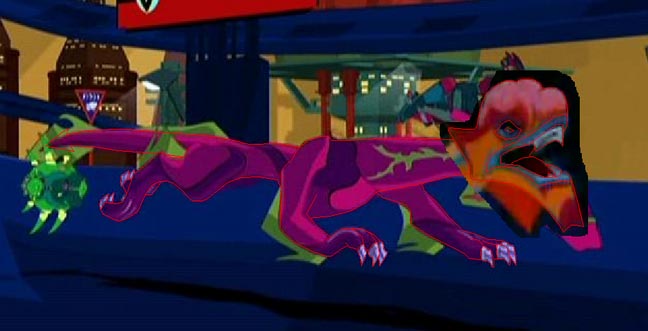
Step 3: Trace Your Dragon
Step 4: Isolate the Outline

Ask questions or comment on this topic here.
All Dragon Booster characters and related logos are the property of The Story Hat. Read the full notice here. Please report broken links and errors to the webmaster . Unless otherwise noted, all text appearing on this web site as well as all non-character based design elements are Copyright © 2005-2007 by Curt Schimmel.